Learn_Vulkan03_渲染框架实现_窗口和Vulkan环境
在上一篇文章讨论了工程的基本结构,接下来要把Vulkan、日志系统和窗口系统植入到本框架。
以下是准备使用的版本约定:
| 第三方库 | 版本号 | 描述 |
|---|---|---|
| spdlog | 1.13.0 | 日志系统. Very fast, header-only/compiled, C++ logging library |
| glfw | 3.3.8 | 窗口系统 |
| Vulkan | 1.3.204 | 渲染API |
该工程的源码管理地址:https://gitee.com/xingchen0085/adiosy_engine
本文TAG:TAG_01.00
第三方库全部放在Platform/External目录下。
spdlog
从github下载spdlog 1.13.0版本。https://github.com/gabime/spdlog。
因为spdlog支持Header-only,所以将include目录下的头文件加到我们的第三方库目录就可使用。
为了方便使用,我添加了一个AdLog的类来维护日志相关信息,然后使用宏来完成日志输出。
//Platform/Public/AdLog.h

#ifndef ADLOG_H
#define ADLOG_H

#include "AdEngine.h"

#define SPDLOG_ACTIVE_LEVEL SPDLOG_LEVEL_TRACE
#include "spdlog/spdlog.h"

namespace ade{
    class AdLog{
    public:
        AdLog() = delete;
        AdLog(const AdLog&) = delete;
        AdLog &operator=(const AdLog&) = delete;
        static void Init();

        static spdlog::logger* GetLoggerInstance(){
            assert(sLoggerInstance && "Logger instance is null, maybe you have not execute AdLog::Init().");
            return sLoggerInstance.get();
        }

    private:
        static std::shared_ptr<spdlog::logger> sLoggerInstance;
    };

#define LOG_T(...) SPDLOG_LOGGER_TRACE(ade::AdLog::GetLoggerInstance(), __VA_ARGS__)
#define LOG_D(...) SPDLOG_LOGGER_DEBUG(ade::AdLog::GetLoggerInstance(), __VA_ARGS__)
#define LOG_I(...) SPDLOG_LOGGER_INFO(ade::AdLog::GetLoggerInstance(), __VA_ARGS__)
#define LOG_W(...) SPDLOG_LOGGER_WARN(ade::AdLog::GetLoggerInstance(), __VA_ARGS__)
#define LOG_E(...) SPDLOG_LOGGER_ERROR(ade::AdLog::GetLoggerInstance(), __VA_ARGS__)
}

#endif
具体的日志配置放在.cpp文件中:
//Platform/Private/AdLog.cpp

#include "AdLog.h"
#include "spdlog/sinks/stdout_color_sinks.h"
#include "spdlog/async.h"

namespace ade{

    std::shared_ptr<spdlog::logger> AdLog::sLoggerInstance{};

    void AdLog::Init() {
        sLoggerInstance = spdlog::stdout_color_mt<spdlog::async_factory>("async_logger");
        sLoggerInstance->set_level(spdlog::level::trace);
        sLoggerInstance->set_pattern("%^%H:%M:%S:%e [%P-%t] [%1!L] [%20s:%-4#] - %v%$");
    }
}
这里的AdEngine.h是公共头引入。
//Platform/Public/AdEngine.h

#ifndef AD_ENGINE_H
#define AD_ENGINE_H

#include <iostream>
#include <cassert>
#include <memory>
#include <algorithm>
#include <functional>

#include <string>
#include <sstream>
#include <fstream>
#include <filesystem>
#include <vector>
#include <stack>
#include <queue>
#include <deque>
#include <set>
#include <unordered_map>

#ifdef AD_ENGINE_PLATFORM_WIN32
//Windows
#define VK_USE_PLATFORM_WIN32_KHR
#elif AD_ENGINE_PLATFORM_MACOS
//Macos
#define VK_USE_PLATFORM_MACOS_MVK
#elif AD_ENGINE_PLATFORM_LINUX
// Linux
#define VK_USE_PLATFORM_XCB_KHR

#else
    #error Unsuppots this Platform
#endif

#define AD_ENGINE_GRAPHIC_API_VULKAN

#endif
日志输出测试:
//Sample/SandBox/Main.cpp

#include <iostream>
#include "AdLog.h"

int main(){
    std::cout << "Hello adiosy engine." << std::endl;

    ade::AdLog::Init();
    LOG_T("Log system debug... {0}, {1}, {2}", 1, 0.1f, "abc");

    return EXIT_SUCCESS;
}
运行结果:
窗口系统
从github下载glfw 3.38版本。https://github.com/glfw/glfw/releases/tag/3.3.8。
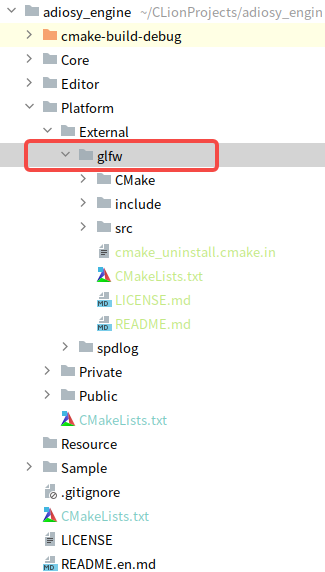
可以选择编译安装到本地,然后使用链接库。但我这里想用一个比较浪费编译时间的方法,就是将源码拷贝到Platform/External目录下,方便查看源码。如下图:
然后在CMakeLists.txt通过add_subdirectory()作为一个子项目来管理。
#Platform/CMakeLists.txt

#GLFW
add_subdirectory(External/glfw)
target_link_libraries(adiosy_platform PUBLIC glfw)
接下来就是创建我们的窗口。在Platform中的实现,我设计为是一个父类,然后根据宏控制使用不同的子类。所以先创建一个抽象的窗口类。
//Platform/Public/AdWindow.h

#ifndef AD_WINDOW_H
#define AD_WINDOW_H

#include "AdEngine.h"

namespace ade{
    class AdWindow{
    public:
        AdWindow(const AdWindow&) = delete;
        AdWindow &operator=(const AdWindow&) = delete;
        virtual ~AdWindow() = default;

        static std::unique_ptr<AdWindow> Create(uint32_t width, uint32_t height, const char *title);

        virtual bool ShouldClose() = 0;
        virtual void PollEvents() = 0;
        virtual void SwapBuffer() = 0;
    protected:
        AdWindow() = default;
    };
}

#endif
//Platform/Private/AdWindow.cpp

#include "AdWindow.h"
#include "Window/AdGLFWwindow.h"

namespace ade{
    std::unique_ptr<AdWindow> AdWindow::Create(uint32_t width, uint32_t height, const char *title) {
#ifdef AD_ENGINE_PLATFORM_WIN32
        return std::make_unique<AdGLFWwindow>(width, height, title);
#elif AD_ENGINE_PLATFORM_MACOS
        return std::make_unique<AdGLFWwindow>(width, height, title);
#elif AD_ENGINE_PLATFORM_LINUX
        return std::make_unique<AdGLFWwindow>(width, height, title);
#endif
        return nullptr;
    }
}
在GLFWwindow中的实现:
//Platform/Public/Window/AdGLFWWindow.h

#ifndef AD_GLFWWINDOW_H
#define AD_GLFWWINDOW_H

#include "AdWindow.h"
#include "GLFW/glfw3.h"

namespace ade{
    class AdGLFWwindow : public AdWindow{
    public:
        AdGLFWwindow() = delete;
        AdGLFWwindow(uint32_t width, uint32_t height, const char *title);
        ~AdGLFWwindow() override;

        bool ShouldClose() override;
        void PollEvents() override;
        void SwapBuffer() override;
    private:
        GLFWwindow *mGLFWwindow;
    };
}

#endif
//Platform/Private/Window/AdGLFWWindow.cpp

#include "Window/AdGLFWwindow.h"
#include "AdLog.h"
#include "GLFW/glfw3native.h"

namespace ade{
    AdGLFWwindow::AdGLFWwindow(uint32_t width, uint32_t height, const char *title) {
        if(!glfwInit()){
            LOG_E("Failed to init glfw.");
            return;
        }
        glfwWindowHint(GLFW_CLIENT_API, GLFW_NO_API);
        glfwWindowHint(GLFW_VISIBLE, GL_FALSE);

        mGLFWwindow = glfwCreateWindow(width, height, title, nullptr, nullptr);
        if(!mGLFWwindow){
            LOG_E("Failed to create glfw window.");
            return;
        }

        GLFWmonitor *primaryMonitor = glfwGetPrimaryMonitor();
        if(primaryMonitor){
            int xPos, yPos, workWidth, workHeight;
            glfwGetMonitorWorkarea(primaryMonitor, &xPos, &yPos, &workWidth, &workHeight);
            glfwSetWindowPos(mGLFWwindow, workWidth / 2 - width / 2, workHeight / 2 - height / 2);
        }

        glfwSwapInterval(0);

        glfwMakeContextCurrent(mGLFWwindow);

        // show window
        glfwShowWindow(mGLFWwindow);
    }

    AdGLFWwindow::~AdGLFWwindow() {
        glfwDestroyWindow(mGLFWwindow);
        glfwTerminate();
        LOG_I("The application running end.");
    }

    bool AdGLFWwindow::ShouldClose() {
        return glfwWindowShouldClose(mGLFWwindow);
    }

    void AdGLFWwindow::PollEvents() {
        glfwPollEvents();
    }

    void AdGLFWwindow::SwapBuffer() {
        glfwSwapBuffers(mGLFWwindow);
    }
}
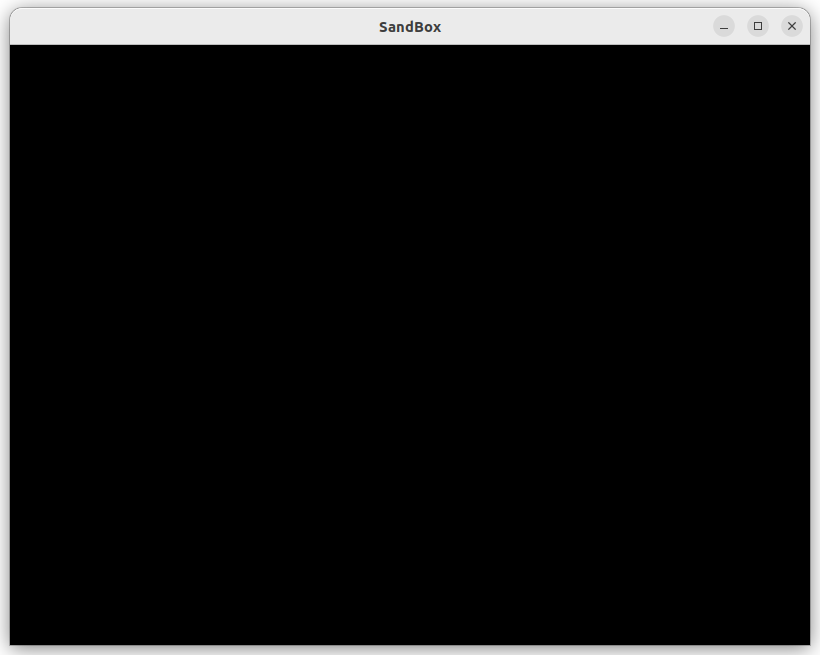
显示窗口:
std::unique_ptr<ade::AdWindow> window = ade::AdWindow::Create(800, 600, "SandBox");
while (!window->ShouldClose()){
    window->PollEvents();

    window->SwapBuffers();
}
Vulkan
安装Vulkan可以参考vulkan-tutorial,这个教程非常详细,这里就不细述了。包括后面Vulkan的基础渲染,也会参考该教程。
在安装好Vulkan后,在CMakeLists.txt中加载进来。
#Platform/CMakeLists.txt

#Vulkan
find_package(Vulkan REQUIRED)
if(Vulkan_FOUND)
    message("Find vulkan success: ${Vulkan_INCLUDE_DIRS}")
    include_directories(${Vulkan_INCLUDE_DIRS})
endif()
然后我们创建一个AdGraphicContext类,这是渲染API的上下文,提供渲染调用。
//Platform/Public/AdGraphicContext.h

#ifndef AD_GRAPHIC_CONTEXT_H
#define AD_GRAPHIC_CONTEXT_H

#include "AdEngine.h"

namespace ade{
    class AdGraphicContext{
    public:
        AdGraphicContext(const AdGraphicContext&) = delete;
        AdGraphicContext &operator=(const AdGraphicContext&) = delete;
        virtual ~AdGraphicContext() = default;

        static std::unique_ptr<AdGraphicContext> Create();
    protected:
        AdGraphicContext() = default;
    private:

    };
}

#endif
//Platform/Private/AdGraphicContext.cpp

#include "AdGraphicContext.h"
#include "Graphic/VK/AdVKGraphicContext.h"

namespace ade{
    std::shared_ptr<AdGraphicContext> AdGraphicContext::Create() {
#ifdef AD_ENGINE_GRAPHIC_API_VULKAN
        return std::make_shared<AdVKGraphicContext>();
#else
        return nullptr;
#endif
        return nullptr;
    }
}
为了测试Vulkan是否可用,我创建了AdVKGraphicContext,然后调用一个Vulkan API测试。
//Platform/Public/Graphic/VK/AdVKGraphicContext.h

#include "AdGraphicContext.h"
#include "Graphic/AdVKGraphicContext.h"

namespace ade{
    std::unique_ptr<AdGraphicContext> AdGraphicContext::Create() {
#ifdef AD_ENGINE_GRAPHIC_API_VULKAN
        return std::make_unique<AdVKGraphicContext>();
#endif
        return nullptr;
    }
}
//Platform/Private/Graphic/VK/AdVKGraphicContext.cpp

#include "Graphic/AdVKGraphicContext.h"
#include "AdLog.h"
#include <vulkan/vulkan.h>

namespace ade{
    AdVKGraphicContext::AdVKGraphicContext() {
        CreateInstance();
    }

    AdVKGraphicContext::~AdVKGraphicContext() {

    }

    void AdVKGraphicContext::CreateInstance() {
        uint32_t availableLayerCount;
        vkEnumerateInstanceLayerProperties(&availableLayerCount, nullptr);
        VkLayerProperties availableLayers[availableLayerCount];
        vkEnumerateInstanceLayerProperties(&availableLayerCount, availableLayers);

        LOG_D("---------------------------");
        LOG_D("Instance Layers: ");
        for(int i = 0; i < availableLayerCount; i++){
            LOG_D("\t {0}", availableLayers[i].layerName);
        }
        LOG_D("---------------------------");
    }
}
然后在我们的测试程序中尝试创建这个渲染API上下文。
//Sample/SandBox/Main.cpp

#include <iostream>
#include "AdLog.h"
#include "AdWindow.h"
#include "AdGraphicContext.h"

int main(){
    ...
    ...
 	std::unique_ptr<ade::AdWindow> window = ade::AdWindow::Create(800, 600, "SandBox");
    std::unique_ptr<ade::AdGraphicContext> graphicContext = ade::AdGraphicContext::Create();
    ...
    ...

    return EXIT_SUCCESS;
}
我在创建Vulkan上下文时候,只是打印了当前设备支持的所有实例Layer。所以运行结果是:
我们可以在命令行工具中输入vulkaninfo,来对比这些Layer是否是一致的。
到目前位置,窗口系统GLFW和Vulkan环境搭建完毕。
- Author: xingchen
- Link: http://www.adiosy.com/posts/learn_vulkan/learn_vulkan03_%E6%B8%B2%E6%9F%93%E6%A1%86%E6%9E%B6%E5%AE%9E%E7%8E%B0_%E7%AA%97%E5%8F%A3%E5%92%8Cvulkan%E7%8E%AF%E5%A2%83.html
- License: This work is under a 知识共享署名-非商业性使用-禁止演绎 4.0 国际许可协议. Kindly fulfill the requirements of the aforementioned License when adapting or creating a derivative of this work.


